Hello Readers! In this post, we are going to learn how to create and use android calendarView programmatically in any android application. We will also learn to add calendarView in linearLayout programmatically in any application.
Output
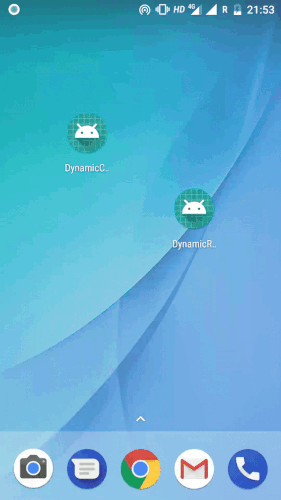
Tutorialwing Android Dynamic CalendarView Output
Getting Started
At first, we will create an android application. Then, we will use calendarView widget in the application.
1. Creating New Project
Follow the steps below to create a new project. Please ignore the steps if you have already created a new project.
| Step | Description |
|---|---|
| 1. | Open Android Studio. |
| 2. | Go to File => New => New Project. Write application name as DynamicCalendarView. Then, click next button. |
| 3. | Select minimum SDK you need. However, we have selected 17 as minimum SDK. Then, click next button |
| 4. | Then, select Empty Activity => click next => click finish. |
| 5. | If you have followed above process correctly, you will get a newly created project successfully. However, you can also visit post to create a new project to know steps in detail. |
Now, we will modify xml and java file to use android calendarView programmatically.
2. Modify values folder
No values folder have been modified. So, we are not going to mention them here.
3. Modify Layout Folder
Open res/layout/activity_main.xml file. Then, add below code into it.
<?xml version="1.0" encoding="utf-8"?>
<LinearLayout
	android:id="@+id/rootContainer"
	xmlns:android="http://schemas.android.com/apk/res/android"
	android:layout_width="match_parent"
	android:layout_height="match_parent"
	android:gravity="center"
	android:orientation="vertical">

</LinearLayout>
In activity_main.xml file, we have defined a linearLayout, with id rootContainer, that will act as container for the calendarView widget created programmatically in the application.
4. Create Android CalendarView Programmatically / Dynamically
Open app/src/main/java/com.tutorialwing.dynamiccalendarview/MainActivity.java file and add below code into it.
package com.tutorialwing.dynamiccalendarview;

import android.os.Bundle;
import android.support.annotation.NonNull;
import android.support.v7.app.AppCompatActivity;
import android.view.ViewGroup;
import android.widget.CalendarView;
import android.widget.LinearLayout;
import android.widget.Toast;

public class MainActivity extends AppCompatActivity {

	@Override
	protected void onCreate(Bundle savedInstanceState) {
		super.onCreate(savedInstanceState);
		setContentView(R.layout.activity_main);

		CalendarView calendarView = new CalendarView(this);
		LinearLayout.LayoutParams layoutParams = new LinearLayout.LayoutParams(ViewGroup.LayoutParams.WRAP_CONTENT, ViewGroup.LayoutParams.WRAP_CONTENT);
		layoutParams.setMargins(90, 40, 80, 40);
		calendarView.setLayoutParams(layoutParams);

		calendarView.setOnDateChangeListener(new CalendarView.OnDateChangeListener() {
			@Override
			public void onSelectedDayChange(@NonNull CalendarView view, int year, int month, int dayOfMonth) {
				//Note that months are indexed from 0. So, 0 means january, 1 means February, 2 means march etc.
				String msg = "Selected date is " + dayOfMonth + "/" + (month + 1) + "/" + year;
				Toast.makeText(MainActivity.this, msg, Toast.LENGTH_SHORT).show();
			}
		});

		LinearLayout linearLayout = findViewById(R.id.rootContainer);
		if (linearLayout != null) {
			linearLayout.addView(calendarView);
		}
	}
}
In MainActivity.java file, we have defined android calendarView widget. Then, we have set layout params, margins etc. in it. After that, we have set a date change listener that will display selected date as toast whenever there is any date change in the calendar. At last, we have added this calendarView widget in linearLayout having id rootContainer.
Since AndroidManifest.xml file is very important in any android project. We are also going to see the content inside this file.
AndroidManifest.xml file
Code inside src/main/AndroidManifest.xml file would look like below –
<?xml version="1.0" encoding="utf-8"?>
<manifest package="com.tutorialwing.dynamiccalendarview"
		  xmlns:android="http://schemas.android.com/apk/res/android">

	<application
		android:allowBackup="true"
		android:icon="@mipmap/ic_launcher"
		android:label="@string/app_name"
		android:roundIcon="@mipmap/ic_launcher_round"
		android:supportsRtl="true"
		android:theme="@style/AppTheme">
		<activity android:name=".MainActivity">
			<intent-filter>
				<action android:name="android.intent.action.MAIN"/>

				<category android:name="android.intent.category.LAUNCHER"/>
			</intent-filter>
		</activity>
	</application>

</manifest>
When we run the application, we will get output as shown above.
That’s the end of tutorial on Creating Android CalendarView Programmatically.
You must be logged in to post a comment.