In this tutorial, we will talk about different android RecyclerView LayoutManagers in android application. We will see how to create different types of user interface like Simple List, GridView or Staggered Grid using various android recyclerView layoutManagers in the application.
We have already discussed about RecyclerView Widget in detail. Here, we have already covered how to use RecyclerView, how to create adapter for RecyclerView, how to customise UI for single item in RecyclerView, how to set ItemClickListener in RecyclerView etc. Moreover, we will use code of previous post into this post 😉
Let’s see a brief introduction about RecyclerView –
Android RecyclerView is more advanced, flexible and efficient version of ListView. UIs like lists and grids can be created very easily using RecyclerView. This widget is a container for displaying large data sets that can be scrolled very efficiently by maintaining a limited number of views. Use RecyclerView when you have large data collections whose elements change at run time based on user actions like click button, or some network operations like get requests, post requests, delete requests etc.
Video Output
Source Code
Android RecyclerView tutorial source code
1. Getting Started
Show list of animals in Linear(Vertical and Horizontal), GridView(Vertical and Horizontal) and Staggered GridView(Vertical and Horizontal). Basically, we will cover all basic android recyclerView layoutManagers used in any application.
1.1. What is LayoutManagers?
As the name suggests, it’s main work is to manage the layout for the large data-set provided by adapter. It positions each item views into it’s appropriate position in the RecycleView. Also, It re-uses the views that are no longer visible to the user. During this, It may ask the adapter to replace the contents of that view with a different element from data-set. Recycling(or Re-using) views in this manners improves performance a lot since there is no need to create extra views and perform costly operations like findViewById() etc. in it now. Due to this feature, This widget is named as RecyclerView (Means a widget that re-uses the views).
1.2 Types Of Android RecyclerView LayoutManagers.
Although you can create your own custom LayoutManagers, There are three types of built-in recyclerView LayoutManagers. They are LinearLayoutManager, GridLayoutManager and StaggeredGridLayoutManager.
Now, we will go through each type one by one –
Android RecyclerView LinearLayoutManager
Use this LayoutManager when you want to show item in a vertical or horizontal scrolling list.
To show vertical scrolling list
LinearLayoutManager linearLayoutManager = new LinearLayoutManager(this);
recyclerView.setLayoutManager(linearLayoutManager);
To show horizontal scrolling list
LinearLayoutManager linearLayoutManager = new LinearLayoutManager(this, LinearLayoutManager.HORIZONTAL, false);
recyclerView.setLayoutManager(linearLayoutManager);
Android RecyclerView GridLayoutManager
Use this LayoutManger when you want to show item in Grid i.e. Gallery etc. You can show Grid view which scrolls either vertically or horizontally.
To show Vertically scrolling Grid View
int spanCount = 2;
GridLayoutManager gridLayoutManager = new GridLayoutManager(this, spanCount);
recyclerView.setLayoutManager(gridLayoutManager);
To show Horizontally scrolling Grid View
int spanCount = 2;
GridLayoutManager gridLayoutManager = new GridLayoutManager(this, spanCount, LinearLayoutManager.HORIZONTAL, false);
recyclerView.setLayoutManager(gridLayoutManager);
Android RecyclerView StaggeredGridLayoutManager
Use this LayoutManager when you want to show items in Staggered Grid.
To Show Vertically Scrolling StaggeredGrid View
int spanCount = 2;
StaggeredGridLayoutManager staggeredGridLayoutManager = new StaggeredGridLayoutManager(spanCount, StaggeredGridLayoutManager.VERTICAL);
recyclerView.setLayoutManager(staggeredGridLayoutManager);
To Show Horizontally Scrolling StaggeredGrid View
int spanCount = 2;
StaggeredGridLayoutManager staggeredGridLayoutManager = new StaggeredGridLayoutManager(spanCount, StaggeredGridLayoutManager.HORIZONTAL);
recyclerView.setLayoutManager(staggeredGridLayoutManager);
2. Using Different Android RecyclerView LayoutManagers
To show different types of LayoutManagers, We will use Menu options (Shown at top-right corner of the screen).
At First, we sill see how to create these menus. Then, we will show different views, created using different layoutManagers, on click of these menu options.
Note: We will use code of previous post into this post. So, get the source code of previous post first.
2.1 Create Option Menus
Follow below steps to create menus.
a. Create menu folder in res/layout.
b. Then, create menu_main.xml in res/layout/menu folder.
After creating menu_main.xml file, copy/paste below code into it.
<?xml version="1.0" encoding="utf-8"?>
<menu xmlns:android="http://schemas.android.com/apk/res/android"
      xmlns:app="http://schemas.android.com/apk/res-auto">
    <item
        android:id="@+id/linearVertical"
        android:orderInCategory="100"
        android:title="Linear Vertical"
        app:showAsAction="never"/>
    <item
        android:id="@+id/linearHorizontal"
        android:orderInCategory="100"
        android:title="Linear Horizontal"
        app:showAsAction="never"/>
    <item
        android:id="@+id/gridviewVertical"
        android:orderInCategory="100"
        android:title="GridView Vertical"
        app:showAsAction="never"/>
    <item
        android:id="@+id/gridviewHorizontal"
        android:orderInCategory="100"
        android:title="GridView Horizontal"
        app:showAsAction="never"/>
    <item
        android:id="@+id/staggeredGridviewVertical"
        android:orderInCategory="100"
        android:title="Staggered Gridview Vertical"
        app:showAsAction="never"/>
    <item
        android:id="@+id/staggeredGridviewHorizontal"
        android:orderInCategory="100"
        android:title="Staggered Gridview Horizontal"
        app:showAsAction="never"/>
</menu>
c. Copy paste below code into MainActivity.java
@Override
public boolean onCreateOptionsMenu(Menu menu) {
	// Inflate the menu; this adds items to the action bar if it is present.
	getMenuInflater().inflate(R.menu.menu_main, menu);
	return true;
}

@Override
public boolean onOptionsItemSelected(MenuItem item) {
	// Handle action bar item clicks here. The action bar will
	// automatically handle clicks on the Home/Up button, so long
	// as you specify a parent activity in AndroidManifest.xml.
	return super.onOptionsItemSelected(item);
}
It will create menu in app. You will see menus if you run the app at this point.
2.2 Create Layout for Horizontal Views
To show horizontal scrollable view, create an xml file list_item_horizontal.xml in res/layout. Then, Add following code into it.
<?xml version="1.0" encoding="utf-8"?>
<LinearLayout xmlns:android="http://schemas.android.com/apk/res/android"
              android:layout_width="match_parent"
              android:layout_height="match_parent"
              android:background="#f0f0f0"
              android:orientation="vertical"
              android:padding="2dp">

    <LinearLayout
        android:layout_width="match_parent"
        android:layout_height="match_parent"
        android:background="@android:color/white"
        android:gravity="center"
        android:orientation="vertical"
        android:padding="14dp">

        <TextView
            android:id="@+id/name"
            android:layout_width="match_parent"
            android:layout_height="wrap_content"
            android:layout_marginBottom="15dp"
            android:gravity="center"
            android:textSize="20dp"
            android:textStyle="bold"/>

        <TextView
            android:id="@+id/details"
            android:layout_width="match_parent"
            android:layout_height="wrap_content"
            android:gravity="center"/>

    </LinearLayout>
</LinearLayout>
2.3 Show views using different android recyclerView LayoutManagers
Write code to show different views on menu item click. Add below code into onOptionsItemSelected method in MainActivity.java file.
int layoutId = R.layout.list_item;
int spanCount = 2;
switch (item.getItemId()) {
	case R.id.linearVertical:  // Vertical scrollable using LinearLayoutManager.
		recyclerView.setLayoutManager(new LinearLayoutManager(this));
		break;
	case R.id.linearHorizontal:  // Horizontal scrollable using LinearLayoutManager.
		layoutId = R.layout.list_item_horizontal;
		recyclerView.setLayoutManager(new LinearLayoutManager(this, LinearLayoutManager.HORIZONTAL, false));
		break;
	case R.id.gridviewVertical:  // Vertical scrollable using GridLayoutManager.
		recyclerView.setLayoutManager(new GridLayoutManager(this, spanCount));
		break;
	case R.id.gridviewHorizontal:  // Horizontal scrollable using GridLayoutManager.
		layoutId = R.layout.list_item_horizontal;
		recyclerView.setLayoutManager(new GridLayoutManager(this, spanCount, LinearLayoutManager.HORIZONTAL, false));
		break;
	case R.id.staggeredGridviewVertical:  // Vertical scrollable using StaggeredGridLayoutManager.
		recyclerView.setLayoutManager(new StaggeredGridLayoutManager(spanCount, StaggeredGridLayoutManager.VERTICAL));
		break;
	case R.id.staggeredGridviewHorizontal:  // Horizontal scrollable using StaggeredGridLayoutManager.
		layoutId = R.layout.list_item_horizontal;
		recyclerView.setLayoutManager(new StaggeredGridLayoutManager(spanCount, StaggeredGridLayoutManager.HORIZONTAL));
		break;
}
adapter = new AnimalAdapter(animalList, layoutId);
recyclerView.setAdapter(adapter);
Final MainActivity.java class code
Below is final MainActivity.java class code
package tutorialwing.com.recyclerviewtutorial.activity;

import android.content.Context;
import android.os.Bundle;
import android.support.v7.app.AppCompatActivity;
import android.support.v7.widget.GridLayoutManager;
import android.support.v7.widget.LinearLayoutManager;
import android.support.v7.widget.RecyclerView;
import android.support.v7.widget.StaggeredGridLayoutManager;
import android.view.GestureDetector;
import android.view.Menu;
import android.view.MenuItem;
import android.view.MotionEvent;
import android.view.View;
import android.widget.Toast;

import java.util.ArrayList;
import java.util.List;

import tutorialwing.com.recyclerviewtutorial.R;
import tutorialwing.com.recyclerviewtutorial.adapter.AnimalAdapter;
import tutorialwing.com.recyclerviewtutorial.model.Animal;

public class MainActivity extends AppCompatActivity {
	private static final String TAG = MainActivity.class.getSimpleName();

	RecyclerView recyclerView;
	AnimalAdapter adapter;
	List<Animal> animalList = new ArrayList<>();

	@Override
	protected void onCreate(Bundle savedInstanceState) {
		super.onCreate(savedInstanceState);
		setContentView(R.layout.activity_main);

		recyclerView = (RecyclerView) findViewById(R.id.animalListRecyclerView);

		createAnimalList(); // Create the data.

		//This is to show data for first time when we run the app.
		recyclerView.setLayoutManager(new LinearLayoutManager(this));
		adapter = new AnimalAdapter(animalList, R.layout.list_item);
		recyclerView.setAdapter(adapter);

		//Add OnItemTouchListener in RecyclerView
		recyclerView.addOnItemTouchListener(new RecyclerTouchListener(getApplicationContext(), recyclerView, new ClickListener() {
			@Override
			public void onClick(View view, int position) {
				Animal animal = animalList.get(position);
				Toast.makeText(getApplicationContext(), animal.getName() + " is selected!", Toast.LENGTH_LONG).show();
			}

			@Override
			public void onLongClick(View view, int position) {
			}
		}));
	}

	@Override
	public boolean onCreateOptionsMenu(Menu menu) {
		// Inflate the menu; this adds items to the action bar if it is present.
		getMenuInflater().inflate(R.menu.menu_main, menu);
		return true;
	}

	@Override
	public boolean onOptionsItemSelected(MenuItem item) {
		// Handle action bar item clicks here. The action bar will
		// automatically handle clicks on the Home/Up button, so long
		// as you specify a parent activity in AndroidManifest.xml.

		int layoutId = R.layout.list_item;
		int spanCount = 2;
		switch (item.getItemId()) {
			case R.id.linearVertical:  // Vertical scrollable using LinearLayoutManager.
				recyclerView.setLayoutManager(new LinearLayoutManager(this));
				break;
			case R.id.linearHorizontal:  // Horizontal scrollable using LinearLayoutManager.
				layoutId = R.layout.list_item_horizontal;
				recyclerView.setLayoutManager(new LinearLayoutManager(this, LinearLayoutManager.HORIZONTAL, false));
				break;
			case R.id.gridviewVertical:  // Vertical scrollable using GridLayoutManager.
				recyclerView.setLayoutManager(new GridLayoutManager(this, spanCount));
				break;
			case R.id.gridviewHorizontal:  // Horizontal scrollable using GridLayoutManager.
				layoutId = R.layout.list_item_horizontal;
				recyclerView.setLayoutManager(new GridLayoutManager(this, spanCount, LinearLayoutManager.HORIZONTAL, false));
				break;
			case R.id.staggeredGridviewVertical:  // Vertical scrollable using StaggeredGridLayoutManager.
				recyclerView.setLayoutManager(new StaggeredGridLayoutManager(spanCount, StaggeredGridLayoutManager.VERTICAL));
				break;
			case R.id.staggeredGridviewHorizontal:  // Horizontal scrollable using StaggeredGridLayoutManager.
				layoutId = R.layout.list_item_horizontal;
				recyclerView.setLayoutManager(new StaggeredGridLayoutManager(spanCount, StaggeredGridLayoutManager.HORIZONTAL));
				break;
		}
		adapter = new AnimalAdapter(animalList, layoutId);
		recyclerView.setAdapter(adapter);

		return super.onOptionsItemSelected(item);
	}


	private void createAnimalList() {

		// Create data...

		Animal animal1 = new Animal();
		animal1.setName("Monkey");
		animal1.setDetails("Monkeys are haplorhine (\"dry-nosed\") primates, a paraphyletic group generally possessing tails and consisting of approximately 260 known living species");

		Animal animal2 = new Animal();
		animal2.setName("Buffalo");
		animal2.setDetails("The African buffalo or Cape buffalo (Syncerus caffer) is a large African bovine");

		Animal animal3 = new Animal();
		animal3.setName("Donkey");
		animal3.setDetails("The donkey or ass is a domesticated member of the horse family, Equidae. The wild ancestor of the donkey is the African wild ass, E. africanus");

		Animal animal4 = new Animal();
		animal4.setName("Dog");
		animal4.setDetails("The domestic dog is a domesticated canid which has been selectively bred over millennia for various behaviours, sensory capabilities, and physical attributes");

		Animal animal5 = new Animal();
		animal5.setName("Goat");
		animal5.setDetails("The domestic goat is a subspecies of goat domesticated from the wild goat of southwest Asia and Eastern Europe");

		Animal animal6 = new Animal();
		animal6.setName("Tiger");
		animal6.setDetails("The tiger is the largest cat species, most recognisable for their pattern of dark vertical stripes on reddish-orange fur with a lighter underside");

		Animal animal7 = new Animal();
		animal7.setName("Lion");
		animal7.setDetails("The lion is one of the big cats in the genus Panthera and a member of the family Felidae.");

		Animal animal8 = new Animal();
		animal8.setName("Leopard");
		animal8.setDetails("The leopard is one of the five \"big cats\" in the genus Panthera");

		Animal animal9 = new Animal();
		animal9.setName("Cheetah");
		animal9.setDetails("The cheetah, also known as the hunting leopard, is a big cat that occurs mainly in eastern and southern Africa and a few parts of Iran");

		Animal animal10 = new Animal();
		animal10.setName("Rat");
		animal10.setDetails("Rats are various medium-sized, long-tailed rodents of the superfamily Muroidea");

		animalList.add(animal1);
		animalList.add(animal2);
		animalList.add(animal3);
		animalList.add(animal4);
		animalList.add(animal5);
		animalList.add(animal6);
		animalList.add(animal7);
		animalList.add(animal8);
		animalList.add(animal9);
		animalList.add(animal10);
	}


	public interface ClickListener {
		void onClick(View view, int position);

		void onLongClick(View view, int position);
	}

	public static class RecyclerTouchListener implements RecyclerView.OnItemTouchListener {

		private GestureDetector gestureDetector;
		private MainActivity.ClickListener clickListener;

		public RecyclerTouchListener(Context context, final RecyclerView recyclerView, final MainActivity.ClickListener clickListener) {
			this.clickListener = clickListener;
			gestureDetector = new GestureDetector(context, new GestureDetector.SimpleOnGestureListener() {
				@Override
				public boolean onSingleTapUp(MotionEvent e) {
					return true;
				}

				@Override
				public void onLongPress(MotionEvent e) {
					View child = recyclerView.findChildViewUnder(e.getX(), e.getY());
					if (child != null && clickListener != null) {
						clickListener.onLongClick(child, recyclerView.getChildAdapterPosition(child));
					}
				}
			});
		}

		@Override
		public boolean onInterceptTouchEvent(RecyclerView rv, MotionEvent e) {
			View child = rv.findChildViewUnder(e.getX(), e.getY());
			if (child != null && clickListener != null && gestureDetector.onTouchEvent(e)) {
				clickListener.onClick(child, rv.getChildAdapterPosition(child));
			}
			return false;
		}

		@Override
		public void onTouchEvent(RecyclerView rv, MotionEvent e) {
		}

		@Override
		public void onRequestDisallowInterceptTouchEvent(boolean disallowIntercept) {
		}
	}
}
Output
If you run the app, you will get vertical scrollable list. You can change the view type as well. You just need to select the options from menu (right-top corner of the screen). For more details, check the output shown as above.
Final Folder Structure
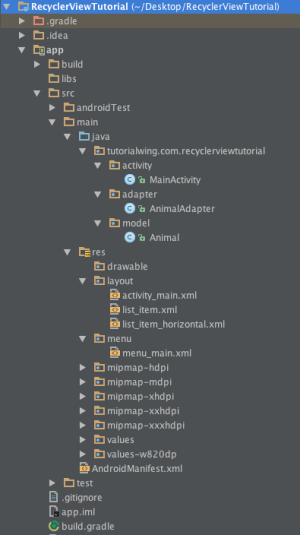
Tutorialwing – RecyclerView Folder structure
Note: We have used code of Android RecyclerView tutorial into this post to show example. Please go through previous post as well to understand this post clearly.
Conclusion
RecyclerView is very useful widget when you want to display large data-set. It can be used to display views like Simple List, Grid or Staggered Grid. It can be used to create horizontal as well as vertical scrollable list using different layoutManagers. Here, we have shown example for each LayoutManagers on menu item click.
You must be logged in to post a comment.