Android RecyclerView is more advanced, flexible and efficient version of ListView. UIs like lists and grids can be created very easily using RecyclerView. This widget is a container for displaying large data sets that can be scrolled very efficiently by maintaining a limited number of views. Use Android RecyclerView when you have large data collections whose elements change at run time based on user actions like click button, or some network operations like get requests, post requests, delete requests etc.
Output
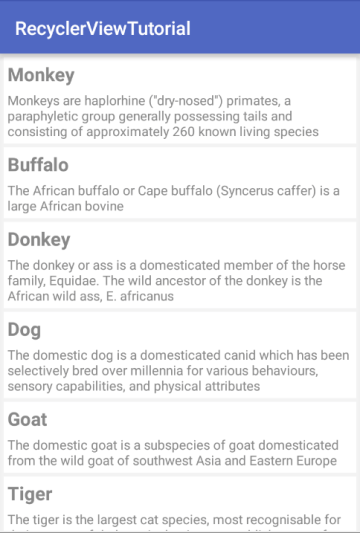
Tutorialwing – android recyclerview tutorial output
Video Output
At the end, you will be able to show some data(Here, list of animal) in Android RecyclerView Project.
Source Code
RecyclerView tutorial source code
1. Getting Started
At first, we will create setup to use RecyclerView. Then, we will use android RecyclerView widget in Android Application.
1.1 Creating new project
Follow steps written below to create a new project.
a. Goto File –> New –> New Project. Then, Write application name as RecyclerViewTutorial and click next.
b. Select Minimum SDK 15 or more –> click next –> Select Empty Activity –> click next –> click finish.
If you have followed above process correctly, you will get a newly created project successfully.
1.2 Add Gradle for RecyclerView in app/build.gradle
dependencies {
    compile fileTree(dir: 'libs', include: ['*.jar'])
    testCompile 'junit:junit:4.12'
    compile 'com.android.support:appcompat-v7:23.4.0'

    //Gradle for RecyclerView
    compile 'com.android.support:recyclerview-v7:23.4.0'
}
1.3 Create different packages
Create three packages model, adapter and activity in tutorialwing. com.recyclerviewtutorial package. Then, move MainActivity class into activity package.
At last, you will get folder structures like below.

Tutorialwing – Android RecyclerView folder structure
1.4 Add Android RecyclerView Widget into activity_main.xml
<?xml version="1.0" encoding="utf-8"?>
<RelativeLayout
    xmlns:android="http://schemas.android.com/apk/res/android"
    xmlns:tools="http://schemas.android.com/tools"
    android:layout_width="match_parent"
    android:layout_height="match_parent"
    android:padding="2dp"
    tools:context=".activity.MainActivity">

    <android.support.v7.widget.RecyclerView
        android:id="@+id/animalListRecyclerView"
        android:layout_width="match_parent"
        android:layout_height="match_parent">
    </android.support.v7.widget.RecyclerView>
</RelativeLayout>
1.5 Creating Model class
Since we are going to show list of animals, their name and details, into recyclerView. We need two fields, i.e. name and details, in model class. You may add other fields, e.g. image, email etc., as well into it. For the sake of simplicity of this post, I am using only name and details.
Create class Animal in model package. Now, copy paste below code into it. Finally, our model class will be like below.
model/Animal class
package tutorialwing.com.recyclerviewtutorial.model;
public class Animal {
	String name;
	String details;
	public String getName() {
		return name;
	}
	public void setName(String title) {
		this.name = title;
	}
	public String getDetails() {
		return details;
	}
	public void setDetails(String details) {
		this.details = details;
	}
}
Notice that this class represents the data you are going to show for each item in the recyclerView. You can modify it as per your need. Suppose you want to show list of countries in the RecyclerView. Then, your model class may contain name, national flag, national anthem etc. So, modify it according to your needs. In this tutorial, we are going to show list of animals. So, we will leave it as it is.
1.6 Creating layout for each item
We have already defined what will be the content of each item in the RecyclerView. Now, we need to create ui for each item in the RecyclerView. So, add list_item.xml file in res/layout and copy/paste below code into it.
res/layout/list_item.xml file
<?xml version="1.0" encoding="utf-8"?>
<LinearLayout xmlns:android="http://schemas.android.com/apk/res/android"
              android:layout_width="wrap_content"
              android:layout_height="wrap_content"
              android:background="#f0f0f0"
              android:orientation="vertical"
              android:padding="2dp">

    <LinearLayout
        android:layout_width="wrap_content"
        android:layout_height="match_parent"
        android:background="@android:color/white"
        android:orientation="vertical"
        android:padding="4dp">

        <TextView
            android:id="@+id/name"
            android:layout_width="match_parent"
            android:layout_height="wrap_content"
            android:layout_marginBottom="5dp"
            android:textSize="20dp"
            android:textStyle="bold"/>

        <TextView
            android:id="@+id/details"
            android:layout_width="match_parent"
            android:layout_height="match_parent"/>
    </LinearLayout>
</LinearLayout>
Since our model and layout for each item is ready, we will create adapter for RecyclerView.
1.7 Creating Adapter For Android RecyclerView
Create class AnimalAdapter into adapter package and copy/paste below code into it.
adapter/AnimalAdapter class
package tutorialwing.com.recyclerviewtutorial.adapter;

import android.support.v7.widget.RecyclerView;
import android.view.LayoutInflater;
import android.view.View;
import android.view.ViewGroup;
import android.widget.TextView;

import java.util.List;

import tutorialwing.com.recyclerviewtutorial.R;
import tutorialwing.com.recyclerviewtutorial.model.Animal;

public class AnimalAdapter extends RecyclerView.Adapter<AnimalAdapter.AnimalViewHolder> {

	private List<Animal> animals;
	private int rowLayout;

	public AnimalAdapter(List<Animal> animals, int rowLayout) {
		this.animals = animals;
		this.rowLayout = rowLayout;
	}

	@Override
	public AnimalViewHolder onCreateViewHolder(ViewGroup parent, int viewType) {
		View view = LayoutInflater.from(parent.getContext()).inflate(rowLayout, parent, false);
		return new AnimalViewHolder(view);
	}

	@Override
	public void onBindViewHolder(AnimalViewHolder holder, final int position) {
		holder.name.setText(animals.get(position).getName());
		holder.details.setText(animals.get(position).getDetails());
	}

	@Override
	public int getItemCount() {
		return animals.size();
	}

	public static class AnimalViewHolder extends RecyclerView.ViewHolder {
		TextView name;
		TextView details;

		public AnimalViewHolder(View v) {
			super(v);
			name = (TextView) v.findViewById(R.id.name);
			details = (TextView) v.findViewById(R.id.details);
		}
	}
}
This adapter class contains :
i. A constructor (AnimalAdapter): This takes parameters animals(list of animals we want to show) and rowLayout(resource layout id we want to show for each item. Here, it’s R.layout.list_item.xml).
ii. onCreateViewHolder method : This method is called to create a new viewHolder for RecyclerView whenever it needs to create. Also, It initialises some private fields to be used for RecyclerView.
iii. onBindViewHolder method : This method is responsible to update the contents of item at the given position. It also setup some private fields to be used for RecyclerView. Note that when view is Recycled(or re-used) this method is called while onCreateViewHolder is not called.
iv. getItemCount method : Returns total number of items in the data-set hold by adapter. Here, it’s total number of animals.
v. static class AnimalViewHolder : This is static class to represent an item (or a row) in the RecycleView.
Note that AnimalAdapter class extends RecyclerView.Adapter< AnimalAdapter.AnimalViewHolder >
1.8 Creating data and setting it into RecyclerView
Till now we have added RecyclerView into activity_main.xml and created model, each item layout and adapter successfully. Now, we are going to create a set of animals and show it into RecyclerView.
Note: There are different types of LayoutManagers. We can create List or Grid like structure using these layoutManagers. Here, we are going to use LinearLayoutManager since we want to show List like view. If you want, you may learn more about RecyclerView LayoutManagers.
Goto MainActivity.java and copy/paste below code.
package tutorialwing.com.recyclerviewtutorial.activity;

import android.os.Bundle;
import android.support.v7.app.AppCompatActivity;
import android.support.v7.widget.LinearLayoutManager;
import android.support.v7.widget.RecyclerView;

import java.util.ArrayList;
import java.util.List;

import tutorialwing.com.recyclerviewtutorial.R;
import tutorialwing.com.recyclerviewtutorial.adapter.AnimalAdapter;
import tutorialwing.com.recyclerviewtutorial.model.Animal;

public class MainActivity extends AppCompatActivity {
	private static final String TAG = MainActivity.class.getSimpleName();

	RecyclerView recyclerView;
	AnimalAdapter adapter;
	List<Animal> animalList = new ArrayList<>();

	@Override
	protected void onCreate(Bundle savedInstanceState) {
		super.onCreate(savedInstanceState);
		setContentView(R.layout.activity_main);

		recyclerView = (RecyclerView) findViewById(R.id.animalListRecyclerView);
		recyclerView.setLayoutManager(new LinearLayoutManager(this));

		createAnimalList(); // Create the data.

		// Set data into adapter and adapter to recyclerView.
		adapter = new AnimalAdapter(animalList, R.layout.list_item);
		recyclerView.setAdapter(adapter);
	}

	private void createAnimalList() {

		// Create data...

		Animal animal1 = new Animal();
		animal1.setName("Monkey");
		animal1.setDetails("Monkeys are haplorhine (\"dry-nosed\") primates, a paraphyletic group generally possessing tails and consisting of approximately 260 known living species");

		Animal animal2 = new Animal();
		animal2.setName("Buffalo");
		animal2.setDetails("The African buffalo or Cape buffalo (Syncerus caffer) is a large African bovine");

		Animal animal3 = new Animal();
		animal3.setName("Donkey");
		animal3.setDetails("The donkey or ass is a domesticated member of the horse family, Equidae. The wild ancestor of the donkey is the African wild ass, E. africanus");

		Animal animal4 = new Animal();
		animal4.setName("Dog");
		animal4.setDetails("The domestic dog is a domesticated canid which has been selectively bred over millennia for various behaviours, sensory capabilities, and physical attributes");

		Animal animal5 = new Animal();
		animal5.setName("Goat");
		animal5.setDetails("The domestic goat is a subspecies of goat domesticated from the wild goat of southwest Asia and Eastern Europe");

		Animal animal6 = new Animal();
		animal6.setName("Tiger");
		animal6.setDetails("The tiger is the largest cat species, most recognisable for their pattern of dark vertical stripes on reddish-orange fur with a lighter underside");

		Animal animal7 = new Animal();
		animal7.setName("Lion");
		animal7.setDetails("The lion is one of the big cats in the genus Panthera and a member of the family Felidae.");

		Animal animal8 = new Animal();
		animal8.setName("Leopard");
		animal8.setDetails("The leopard is one of the five \"big cats\" in the genus Panthera");

		Animal animal9 = new Animal();
		animal9.setName("Cheetah");
		animal9.setDetails("The cheetah, also known as the hunting leopard, is a big cat that occurs mainly in eastern and southern Africa and a few parts of Iran");

		Animal animal10 = new Animal();
		animal10.setName("Rat");
		animal10.setDetails("Rats are various medium-sized, long-tailed rodents of the superfamily Muroidea");

		animalList.add(animal1);
		animalList.add(animal2);
		animalList.add(animal3);
		animalList.add(animal4);
		animalList.add(animal5);
		animalList.add(animal6);
		animalList.add(animal7);
		animalList.add(animal8);
		animalList.add(animal9);
		animalList.add(animal10);
	}
}
If you run the app, you will see list of animals as shown above.
2. Setting Item click listener in Android RecyclerView
RecyclerView doesn’t have setOnItemClickListener. We need to implement this feature in some other ways. For now, we are going to use interface and setOnItemTouchListener to achieve this feature.
2.1 Define interface
In MainActivity, you need to define interface like below.
public interface ClickListener {
	void onClick(View view, int position);
	void onLongClick(View view, int position);
}
2.2 Implement RecyclerView.OnItemTouchListener
Now, implement RecyclerView.OnItemTouchListener like below in MainActivity.
public static class RecyclerTouchListener implements RecyclerView.OnItemTouchListener {

	private GestureDetector gestureDetector;
	private MainActivity.ClickListener clickListener;

	public RecyclerTouchListener(Context context, final RecyclerView recyclerView, final MainActivity.ClickListener clickListener) {
		this.clickListener = clickListener;
		gestureDetector = new GestureDetector(context, new GestureDetector.SimpleOnGestureListener() {
			@Override
			public boolean onSingleTapUp(MotionEvent e) {
				return true;
			}

			@Override
			public void onLongPress(MotionEvent e) {
				View child = recyclerView.findChildViewUnder(e.getX(), e.getY());
				if (child != null && clickListener != null) {
					clickListener.onLongClick(child, recyclerView.getChildAdapterPosition(child));
				}
			}
		});
	}

	@Override
	public boolean onInterceptTouchEvent(RecyclerView rv, MotionEvent e) {
		View child = rv.findChildViewUnder(e.getX(), e.getY());
		if (child != null && clickListener != null && gestureDetector.onTouchEvent(e)) {
				clickListener.onClick(child, rv.getChildAdapterPosition(child));
		}
		return false;
	}

	@Override
	public void onTouchEvent(RecyclerView rv, MotionEvent e) {
	}

	@Override
	public void onRequestDisallowInterceptTouchEvent(boolean disallowIntercept) {
	}
}
2.3 Add addOnItemTouchListener into Android RecyclerView
Finally, addOnItemTouchListener to RecyclerView like below in MainActivity.
recyclerView.addOnItemTouchListener(new RecyclerTouchListener(getApplicationContext(), recyclerView, new ClickListener() {
	@Override
	public void onClick(View view, int position) {
		Animal animal = animalList.get(position);
		Toast.makeText(getApplicationContext(), animal.getName() + " is selected!", Toast.LENGTH_SHORT).show();
	}

	@Override
	public void onLongClick(View view, int position) {
	}
}));
Finally, MainActivity class will be like below
package tutorialwing.com.recyclerviewtutorial.activity;

import android.content.Context;
import android.os.Bundle;
import android.support.v7.app.AppCompatActivity;
import android.support.v7.widget.LinearLayoutManager;
import android.support.v7.widget.RecyclerView;
import android.view.GestureDetector;
import android.view.MotionEvent;
import android.view.View;
import android.widget.Toast;

import java.util.ArrayList;
import java.util.List;

import tutorialwing.com.recyclerviewtutorial.R;
import tutorialwing.com.recyclerviewtutorial.adapter.AnimalAdapter;
import tutorialwing.com.recyclerviewtutorial.model.Animal;

public class MainActivity extends AppCompatActivity {
	private static final String TAG = MainActivity.class.getSimpleName();

	RecyclerView recyclerView;
	AnimalAdapter adapter;
	List<Animal> animalList = new ArrayList<>();

	@Override
	protected void onCreate(Bundle savedInstanceState) {
		super.onCreate(savedInstanceState);
		setContentView(R.layout.activity_main);

		recyclerView = (RecyclerView) findViewById(R.id.animalListRecyclerView);
		recyclerView.setLayoutManager(new LinearLayoutManager(this));

		createAnimalList(); // Create the data.

		// Set data into adapter and adapter to recyclerView.
		adapter = new AnimalAdapter(animalList, R.layout.list_item);
		recyclerView.setAdapter(adapter);

		recyclerView.addOnItemTouchListener(new RecyclerTouchListener(getApplicationContext(), recyclerView, new ClickListener() {
			@Override
			public void onClick(View view, int position) {
				Animal animal = animalList.get(position);
				Toast.makeText(getApplicationContext(), animal.getName() + " is selected!", Toast.LENGTH_LONG).show();
			}

			@Override
			public void onLongClick(View view, int position) {
			}
		}));
	}

	private void createAnimalList() {

		// Create data...

		Animal animal1 = new Animal();
		animal1.setName("Monkey");
		animal1.setDetails("Monkeys are haplorhine (\"dry-nosed\") primates, a paraphyletic group generally possessing tails and consisting of approximately 260 known living species");

		Animal animal2 = new Animal();
		animal2.setName("Buffalo");
		animal2.setDetails("The African buffalo or Cape buffalo (Syncerus caffer) is a large African bovine");

		Animal animal3 = new Animal();
		animal3.setName("Donkey");
		animal3.setDetails("The donkey or ass is a domesticated member of the horse family, Equidae. The wild ancestor of the donkey is the African wild ass, E. africanus");

		Animal animal4 = new Animal();
		animal4.setName("Dog");
		animal4.setDetails("The domestic dog is a domesticated canid which has been selectively bred over millennia for various behaviours, sensory capabilities, and physical attributes");

		Animal animal5 = new Animal();
		animal5.setName("Goat");
		animal5.setDetails("The domestic goat is a subspecies of goat domesticated from the wild goat of southwest Asia and Eastern Europe");

		Animal animal6 = new Animal();
		animal6.setName("Tiger");
		animal6.setDetails("The tiger is the largest cat species, most recognisable for their pattern of dark vertical stripes on reddish-orange fur with a lighter underside");

		Animal animal7 = new Animal();
		animal7.setName("Lion");
		animal7.setDetails("The lion is one of the big cats in the genus Panthera and a member of the family Felidae.");

		Animal animal8 = new Animal();
		animal8.setName("Leopard");
		animal8.setDetails("The leopard is one of the five \"big cats\" in the genus Panthera");

		Animal animal9 = new Animal();
		animal9.setName("Cheetah");
		animal9.setDetails("The cheetah, also known as the hunting leopard, is a big cat that occurs mainly in eastern and southern Africa and a few parts of Iran");

		Animal animal10 = new Animal();
		animal10.setName("Rat");
		animal10.setDetails("Rats are various medium-sized, long-tailed rodents of the superfamily Muroidea");

		animalList.add(animal1);
		animalList.add(animal2);
		animalList.add(animal3);
		animalList.add(animal4);
		animalList.add(animal5);
		animalList.add(animal6);
		animalList.add(animal7);
		animalList.add(animal8);
		animalList.add(animal9);
		animalList.add(animal10);
	}


	public interface ClickListener {
		void onClick(View view, int position);

		void onLongClick(View view, int position);
	}

	public static class RecyclerTouchListener implements RecyclerView.OnItemTouchListener {

		private GestureDetector gestureDetector;
		private MainActivity.ClickListener clickListener;

		public RecyclerTouchListener(Context context, final RecyclerView recyclerView, final MainActivity.ClickListener clickListener) {
			this.clickListener = clickListener;
			gestureDetector = new GestureDetector(context, new GestureDetector.SimpleOnGestureListener() {
				@Override
				public boolean onSingleTapUp(MotionEvent e) {
					return true;
				}

				@Override
				public void onLongPress(MotionEvent e) {
					View child = recyclerView.findChildViewUnder(e.getX(), e.getY());
					if (child != null && clickListener != null) {
						clickListener.onLongClick(child, recyclerView.getChildAdapterPosition(child));
					}
				}
			});
		}

		@Override
		public boolean onInterceptTouchEvent(RecyclerView rv, MotionEvent e) {
			View child = rv.findChildViewUnder(e.getX(), e.getY());
			if (child != null && clickListener != null && gestureDetector.onTouchEvent(e)) {
				clickListener.onClick(child, rv.getChildAdapterPosition(child));
			}
			return false;
		}

		@Override
		public void onTouchEvent(RecyclerView rv, MotionEvent e) {
		}

		@Override
		public void onRequestDisallowInterceptTouchEvent(boolean disallowIntercept) {
		}
	}
}
3. Use Otto Event Bus or Guava Event Bus to set Item ClickListener in RecyclerView
You can also set ItemCLickListener in Android RecyclerView using Otto Event Bus or Guava Event Bus. Please go through Guava event Bus and Otto Event Bus to know more details.
Output
If you run the app and click on any item (let’s say Monkey), It will show a Toast message like “Monkey is selected!”.
Conclusion
Android RecyclerView is very useful widget when you want to display large data-set. It can be used to display views like Simple List, Grid or Staggered Grid. Depending on the type of view, we use LayoutManager. If you want, you learn more about how to use RecyclerView LayoutManager to show data as simple list, GridView or Staggered Grid.
I see you don’t monetize your page, i know how to earn some additional money and get more visitors using one simple method, just search in google for; How to monetize a blog Twardziel advices
yeah .. i know… for now it’s free … enjoy.. 🙂