In this post, we will learn about Lottie animation in android using Kotlin with example. We will go through different examples of attributes related to LottieFiles. We will see how to set playback speed of animation, load animation from url in android app using Lottie library etc.
Getting Started
While developing android application, we must have come across a situation where we need to show animation while performing some actions in app. For example,
- Show progressBar when request to server is in progress
- Show some animation when we navigate from one fragment to another fragment etc.
and many more….
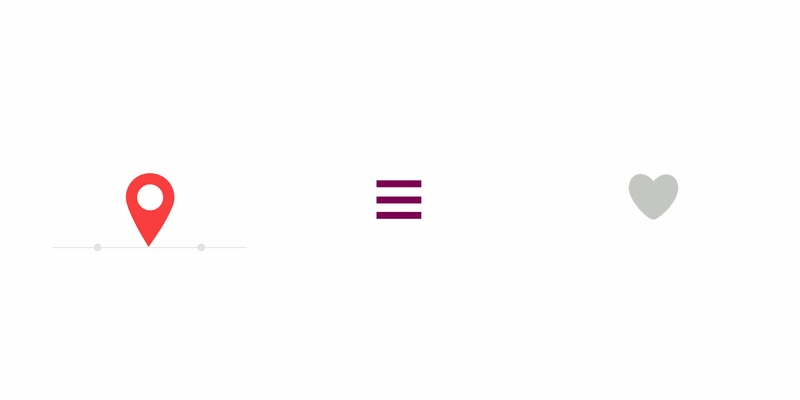
Let’s have some visual example,

Example 1
Example 2
There are several ways using which we can show animation in android app. They are –
- Create Custom animation using ViewAnimator or ObjectAnimator
- Using Third Party Libraries. For example, Lottie
It’s a bit difficult for developers to show above animations using ViewAnimator or ObjectAnimator. But, we can easily do it using Lottie animation with just few lines of code. In this article, we will learn about Lottie Animation in android using Kotlin.
What is Lottie Animation?
As per official documentation,
Lottie is a library for Android, iOS, Web, and Windows that parses Adobe After Effects animations exported as json with Bodymovin and renders them natively on mobile and on the web!
Lottie animations are free to use vector animation file. You can checkout various vector files here. Many popular apps such as Uber, Netflix, Google, Airbnb, Shopify use this library.
In this article, we will learn how to use Lottie library in android app. There is a separate project for android app in Github. If you wish, can visit and checkout about it. We will be using it in this article.
Now, how do we use this library in android app?
1. Create New Project
At first, follow steps below to create new project.
| Step | Description |
|---|---|
| 1. | Open Android Studio (Ignore if already done). |
| 2. | Go to File => New => New Project. This will open a new window. Then, under Phone and Tablet section, select Empty Activity. Then, click Next. |
| 3. | In next screen, select project name as LottieAnimation. Then, fill other required details. |
| 4. | Then, clicking on Finish button creates new project. |
Newbie in Android ?
Some very important concepts (Recommended to learn before you move ahead)
2. Adding Lottie Dependencies (build.gradle)
Gradle is the only supported build configuration, so just add the dependency to app/build.gradle file –
implementation 'com.airbnb.android:lottie:$lottieVersion'
At the time of writing this post, current version is 4.1.0. Finally, it will be –
implementation 'com.airbnb.android:lottie:4.1.0'
Click on Sync Now button shown at top-right corner of Android Studio IDE.
3. Download Lottie Animation File
Now, we need to download animation files we want to use in our project. They are present in various formats – JSON, ZIP or GIF formats etc. In this article, we will be using json format. So, We will download json file.
Follow steps below to download lottie animation file –
- Go to official website for animation files. Screen like below will be shown –

- Now, browse and select any file of your choice. In this article, we want to show progressbar. So, we have searched for progressbar text and selected below progressbar –

- Click on any animation to see it’s detail. After clicking on above progressbar ui, ui like below is shown as popup. –

Note: You can explore various options shown in this window. For example, change speed of animation, background change etc. - Click on Download link. It opens dropdown like below –

- We want to use Lottie as JSON file. So, click on Lottie JSON to download json file.
- Now, create raw folder, if not created, in src/main/res folder.
- Then, move downloaded json file, renamed as progressbar.json, in src/main/res/raw folder. Folder structure will be like –

Different ways using which we can load animation in Lottie –
- A JSON Animation in src/main/res/raw
- A json file in src/main/assets
- A zip file in src/main/assets
- A dotLottie file in src/main/assets
- A url to a json or zip file.
- A json string. The source can be from anything including your own network stack.
- An InputStream to either a json file or a zip file.
4. Using Lottie Animation in XML file
Till now, we have successfully downloaded and moved json file to src/main/res/raw folder. Now, we will use animation file in xml file.
Simplest way to use lottie is with LottieAnimationView class.
It is recommended to use lottie_rawRes because you can use static references to your animation through R instead of just using string names.
Follow step below to do it –
- Open main/res/layout/activity_main.xml file. Then, copy paste below code in it –
<?xml version="1.0" encoding="utf-8"?>
<androidx.constraintlayout.widget.ConstraintLayout xmlns:android="http://schemas.android.com/apk/res/android"
    xmlns:app="http://schemas.android.com/apk/res-auto"
    xmlns:tools="http://schemas.android.com/tools"
    android:layout_width="match_parent"
    android:layout_height="match_parent"
    tools:context=".MainActivity">

    <com.airbnb.lottie.LottieAnimationView
        android:id="@+id/animation_view"
        android:layout_width="wrap_content"
        android:layout_height="wrap_content"
        app:layout_constraintBottom_toBottomOf="parent"
        app:layout_constraintLeft_toLeftOf="parent"
        app:layout_constraintRight_toRightOf="parent"
        app:layout_constraintTop_toTopOf="parent"
        app:lottie_autoPlay="true"
        app:lottie_loop="true"
        app:lottie_rawRes="@raw/progressbar" />

</androidx.constraintlayout.widget.ConstraintLayout>
Here,
- app:lottie_autoPlay=””: Sets if we want to auto play animation or not. Default value is false.
- app:lottie_loop=””: Sets if we want to run animation only one time or infinitely. Default value is false.
- app:lottie_rawRes=””: Reference to resource file where json file is stored. We have stored it in main/res/raw folder. Similarly, we can use other attributes of lottie animation to customise it as per our need.
- Now, run your app. Output will be –

5. Using Lottie Animation Programmatically
Till now, we have seen how to use lottie animation in xml file. Now, we will use it in Kotlin file.
Notice that we have provided an id, animation_view, to com.airbnb.lottie.LottieAnimationView class in xml file. We will use this id to access animation class in Kotlin file.
5.1 Setup ViewBinding
We need to setup viewBinding so that we do n’t need to use findViewById() to access any view in Kotlin file. Add viewBinding = true in app/build.gradle file.
android {

    // OTHER CODE...

    buildFeatures {
        viewBinding = true
    }
}
Now, set content in activity using view binding.
Open MainActivity.kt file and write below code in it.
package com.tutorialwing.lottieanimation

import androidx.appcompat.app.AppCompatActivity
import android.os.Bundle
import com.tutorialwing.lottieanimation.databinding.ActivityMainBinding

class MainActivity : AppCompatActivity() {

    private lateinit var binding: ActivityMainBinding

    override fun onCreate(savedInstanceState: Bundle?) {
        super.onCreate(savedInstanceState)
        binding = ActivityMainBinding.inflate(layoutInflater)
        val view = binding.root
        setContentView(view)
    }

}
5.2 Reset activity_main.xml file
Before we proceed, we need to remove some attributes in xml file. We will set it programmatically in Kotlin file. So, open activity_main.xml file and copy / paste below code in it –
<?xml version="1.0" encoding="utf-8"?>
<androidx.constraintlayout.widget.ConstraintLayout xmlns:android="http://schemas.android.com/apk/res/android"
    xmlns:app="http://schemas.android.com/apk/res-auto"
    xmlns:tools="http://schemas.android.com/tools"
    android:layout_width="match_parent"
    android:layout_height="match_parent"
    tools:context=".MainActivity">

    <com.airbnb.lottie.LottieAnimationView
        android:id="@+id/animation_view"
        android:layout_width="wrap_content"
        android:layout_height="wrap_content"
        app:layout_constraintBottom_toBottomOf="parent"
        app:layout_constraintLeft_toLeftOf="parent"
        app:layout_constraintRight_toRightOf="parent"
        app:layout_constraintTop_toTopOf="parent" />

</androidx.constraintlayout.widget.ConstraintLayout>
Here, we have removed app:lottie_autoPlay=””, app:lottie_loop=”” and app:lottie_rawRes=”” attributes from LottieAnimationView class.
5.3 Access Lottie class in Kotlin file
We can access lottie view using binding.ID_OF_ANIMATION_VIEW_CLASS. For example,
id of com.airbnb.lottie.LottieAnimationView class in activity_main.xml file is animation_view. So, it can be accessed as binding.animationView.
Remember we had removed setup animation in xml file. Now, we will run same lottie animation using kotlin programmatically.
So, open your activity_main.xml file. Then, add below code in it –
package com.tutorialwing.lottieanimation

import androidx.appcompat.app.AppCompatActivity
import android.os.Bundle
import com.airbnb.lottie.LottieDrawable
import com.tutorialwing.lottieanimation.databinding.ActivityMainBinding

class MainActivity : AppCompatActivity() {

    private lateinit var binding: ActivityMainBinding

    override fun onCreate(savedInstanceState: Bundle?) {
        super.onCreate(savedInstanceState)
        binding = ActivityMainBinding.inflate(layoutInflater)
        val view = binding.root
        setContentView(view)

        setupAnim()
    }

    private fun setupAnim() {
        binding.animationView.setAnimation(R.raw.progressbar)
        binding.animationView.repeatCount = LottieDrawable.INFINITE
        binding.animationView.playAnimation()
    }
}
Here,
- setAnimation() sets animation to LottieAnimationView
- repeatCount sets number of times animation to be played
- playAnimation() plays animation set in LottieAnimationView
Now, run application, we will get output as –
6. Dynamic Actions on Android Lottie Animation
We can also perform some actions programmatically in Lottie animation as described below –
-
6.1 Set Lottie Animation Dynamically
Set Lottie animation programmatically as –
ANIMATION_VIEW.setAnimation(REFERENCE_OF_ANIMATION_FILE)
We have already stored json file of selected animation in res/raw folder. Now, we can set animation dynamically as below –
binding.animationView.setAnimation(R.raw.progressbar)
-
6.2 Play Lottie Animation
We can play lottie animation using .playAnimation() method. For example,
binding.animationView.playAnimation()
playAnimation(): Plays the animation from the beginning. If speed is {@literal <} 0, it will start at the end and play towards the beginning.
-
6.3 Resume Lottie Animation
We can resume lottie animation using .resumeAnimation() method. For example,
binding.animationView.resumeAnimation()
resumeAnimation(): Continues playing the animation from its current position. If speed {@literal <} 0, it will play backwards from the current position.
-
6.4 Set Animation Playback Speed
If we want to set playback speed of animation, we can do so using setSpeed() method. For example,
binding.animationView.speed = 5.0F
In above case, animation will be played 5 times faster.
If speed < 0, the animation will play backwards.
-
6.5 Looping in Lottie Animation
If we want to repeat animation, we can do so using setRepeatCount() method. For example,
binding.animationView.repeatCount = 5
In above case, animation will be repeated 5 times.
Note:
If the repeat count is 0, the animation is never repeated. If the repeat count is greater than 0 or {@link LottieDrawable#INFINITE}, the repeat mode will be taken into account. The repeat count is 0 by default. If we want to repeat it infinitely, we can do so as –binding.animationView.repeatCount = LottieDrawable.INFINITE
-
6.6 Loading Lottie Animation from URL
If we want to set Lottie animation from url, we can do so using setAnimationFromUrl() method. For example,
binding.animationView.setAnimationFromUrl("ANIMATION_FILE_URL")Let’s say, we want to load animation file present at url – https://i0.wp.com/tutorialwing.com/wp-content/uploads/2021/09/tutorialwing-android-kotlin-lottie-android-library-progressbar.gif
We can use above url as –
binding.animationView.setAnimationFromUrl("https://i0.wp.com/tutorialwing.com/wp-content/uploads/2021/09/tutorialwing-android-kotlin-lottie-android-library-progressbar.gif")
Impact of Lottie on APK Size
Lottie has very small impact on APK size. It has 1600 methods approx. , and size of 287kb uncompressed.
Pros / Advantages of Lottie
- It supports larger sets of after effects features.
- We may download animation from network.
- We can set playback speed dynamically.
- Masks are anti-aliased
- We can manually set progress to hook up an animation to a gesture, event, etc.
- We can dynamically change the colour of a specific part of an animations
and many more…
Thus, we have seen about Lottie animation in android using Kotlin with example. We have gone through different actions / customization which we can do using Lottie animation in android. For example, loading animation from url, setting animation playback speed dynamically etc.
You must be logged in to post a comment.